Uncool Imaging
The Meade DSI, ZWO, Orion Starshoots, modified web cameras
and modern DSLR camrea
demonstrates that CCD and CMOS sensor technology has improved over
the past decade to
the point that, for moderate exposure times, dark noise can be managed
without cooling the sensor. Conventional astronomical CCD cameras
employ power hungry peltier arrays, hermetically sealed dry chambers,
large noisey power supplies and bulky heat sinks to cool the chips.
Additionally, fast USB/Firewire standards have emerged that allow the
CCD to be read directly into the PC without extensive processing or
memory on the camera. These factors allow the DSI to produce images of
a quality that until now, required cameras costing nearly 10 times as
much.
I have written several
articles on the topic of imaging with uncooled sensors. Below is a link
to paper that previously appeared in the
OPTAS newsletter on the topic.
Uncool Imaging: Video Cameras and Uncooled CCD's
As the paper discusses,
the key to getting the most of a uncooled imager is to choose the
longest exposure time that does not saturate the detector with thermal
electrons (dark noise). Often, it is possible to make due with shorter
exposures. Good quality images have good signal to noise (S/N) ratios.
To improve images, that means reduce the noise or get more signal
(larger aperature).
Those familiar with
cooled CCD imaging will need to learn a few new tricks with uncooled
imagers. The idea is to stack
MANY images to reduce the noise, rather than chill
the sensor. It is a time vs money trade, as are many thing in life. The
DSI software is designed to automate much of this process so that for
moderately bright deep sky objects, the total time to a finished color
image is similar to taking 3 filtered exposures (R,G & B) with
a cooled camera. For fainter objects, longer total times will be
required.
One of the ancillary
benefits of making a finished image up of many shorter exposure times
is that, with a moderately good telescope drive system and alignment,
it is not usually necessary to guide images. This is another big time
saver. With long exposure cooled imagers, it often it can take a
significant portion of the total time to find a guide star and train
the drive system.
For more
Uncool
imaging tips see
the notes at the end to this page.
Slides from a recent lecture titled:
Introdction To DSI Imaging
can be downloaded here as a Adobe PDF file.
As time permits, more
practical tips will appear on this page.
Gallery
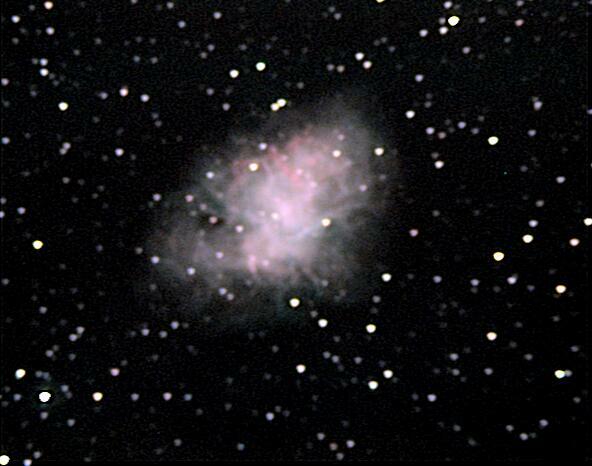 Crab Nebula (M1) - 12" Lx200gps @f3.3 34 minutes (68x30 sec.)
11/14/2004
Crab Nebula (M1) - 12" Lx200gps @f3.3 34 minutes (68x30 sec.)
11/14/2004
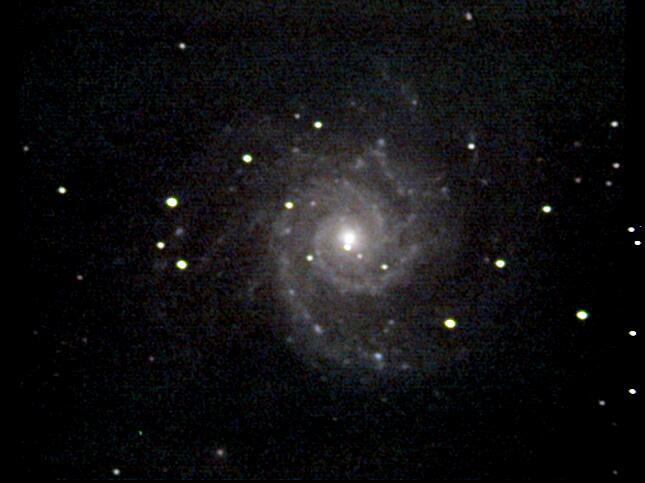 M74 - 12" Lx200gps @f3.3 20 minutes (40x30 sec.) 11/14/2004
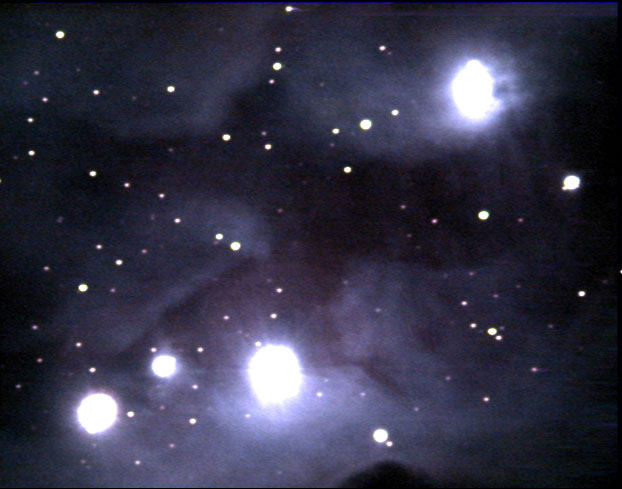 NGC 1977 (The Running Man) - 12" Lx200gps @f3.3 22.5 minutes (55x30
sec.) 11/4/2004
NGC 1977 (The Running Man) - 12" Lx200gps @f3.3 22.5 minutes (55x30
sec.) 11/4/2004
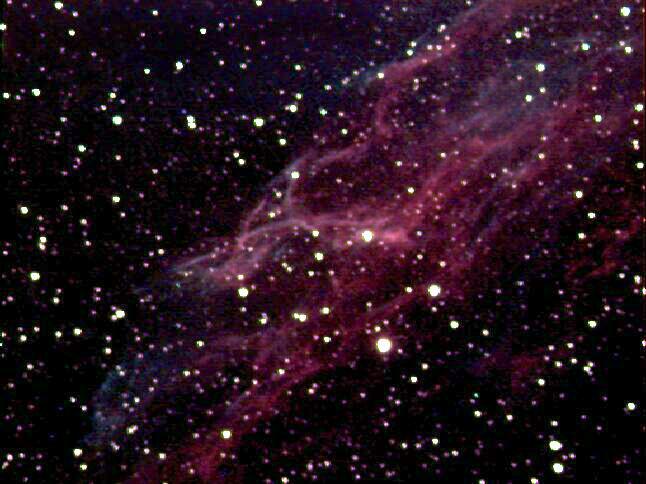 Eastern Veil Nebula (Caldwell 33/NGC 6992)
12" Lx200gps @f3.3 20 minutes (5x240 sec.) 7/20/2004
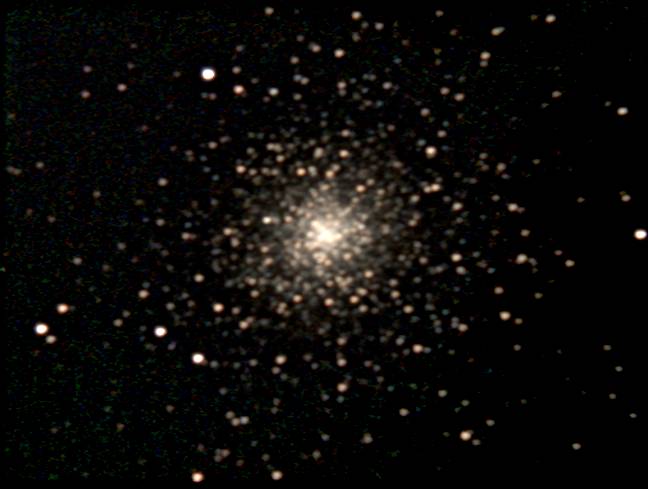 M2
- 12" Lx200gps @f3.3 9.5 minutes (19x30sec.) 11/2/2004
M2
- 12" Lx200gps @f3.3 9.5 minutes (19x30sec.) 11/2/2004
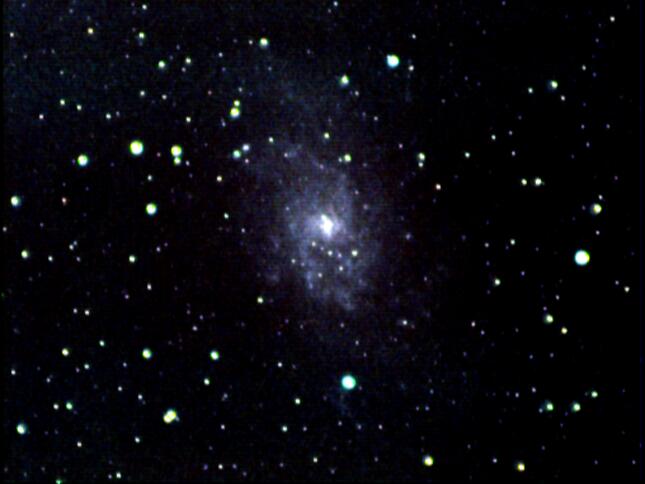 M33
- 70mm Achromat @f3.5 21 minutes (42x30sec.)10/31/2004
M33
- 70mm Achromat @f3.5 21 minutes (42x30sec.)10/31/2004
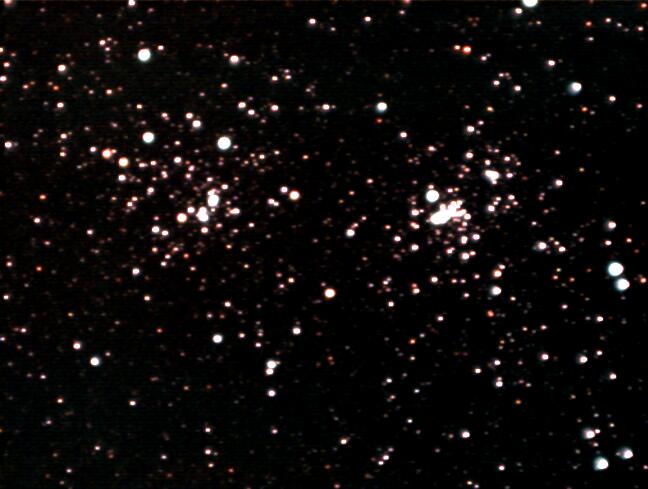 Double
Cluster (NGC884+NGC869) - 70mm Achromat @f3.5 12 minutes
(12x60sec.)10/31/2004
Double
Cluster (NGC884+NGC869) - 70mm Achromat @f3.5 12 minutes
(12x60sec.)10/31/2004
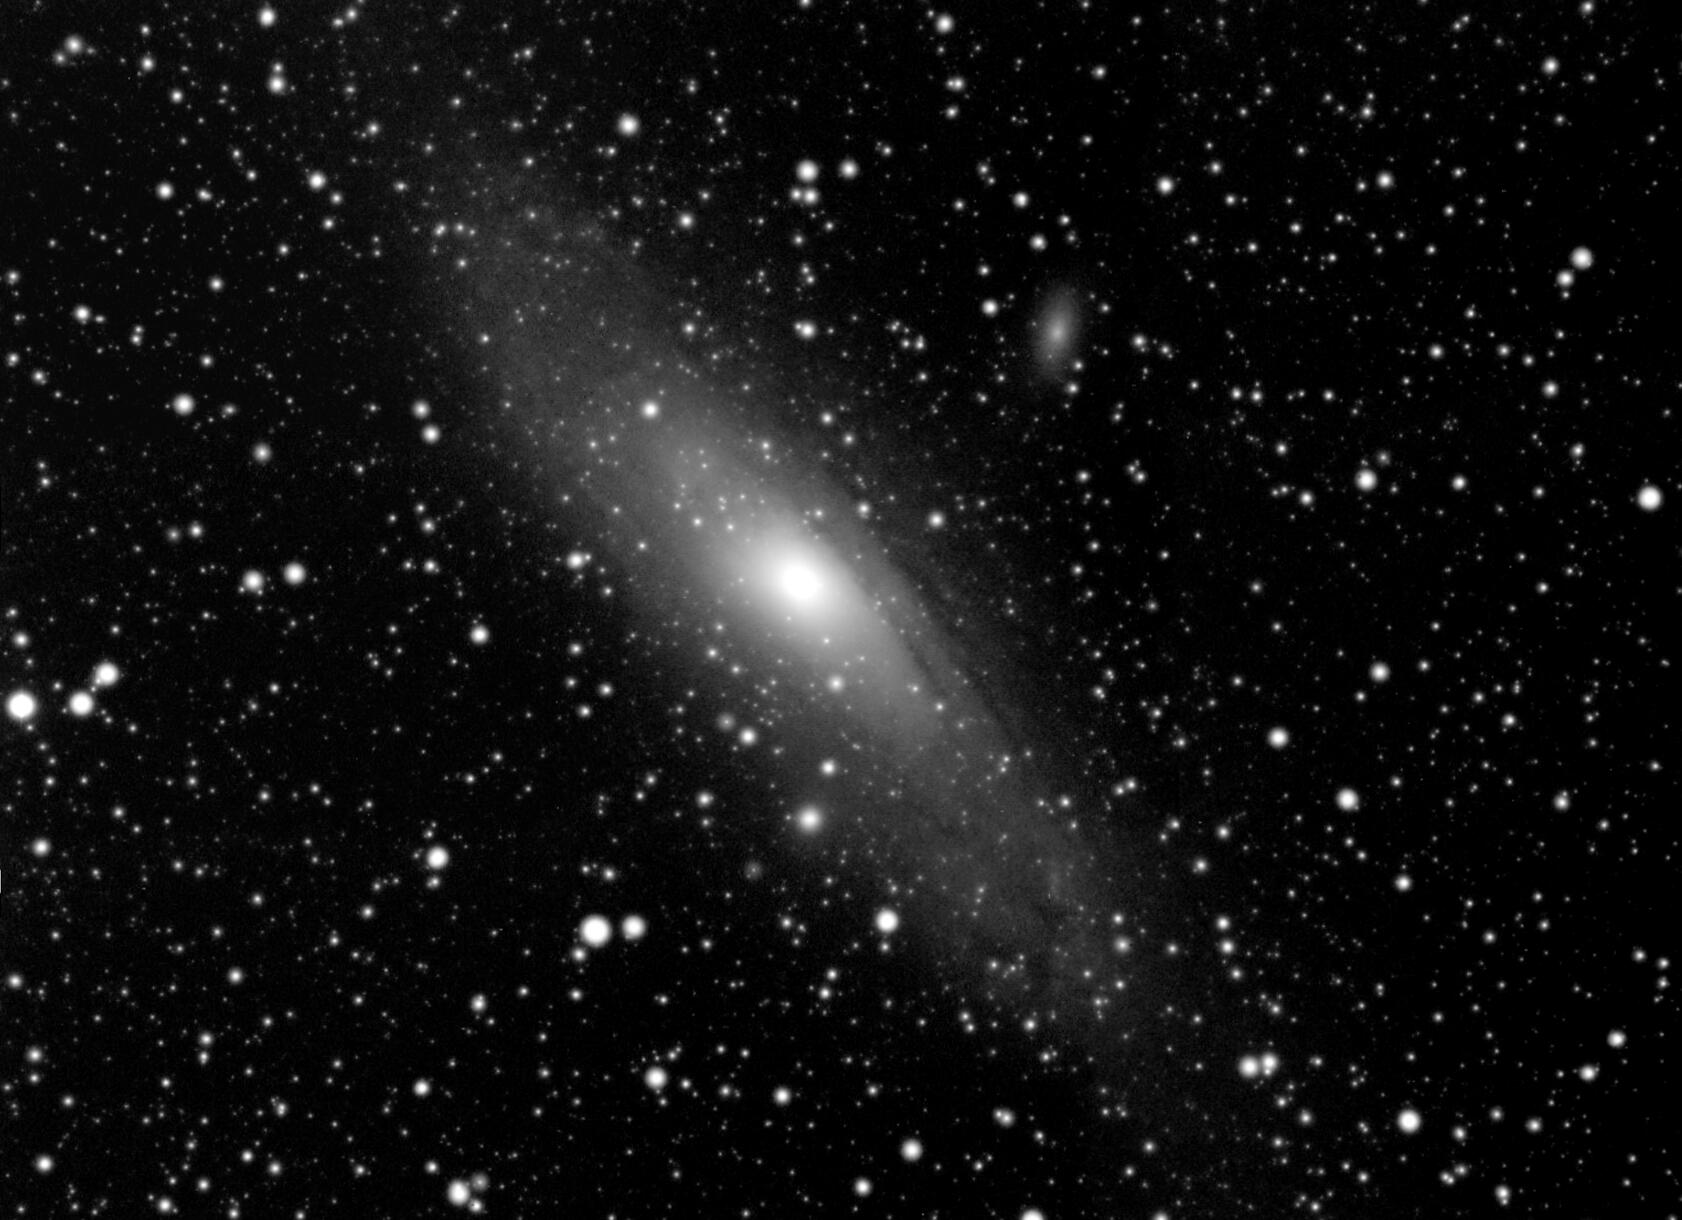
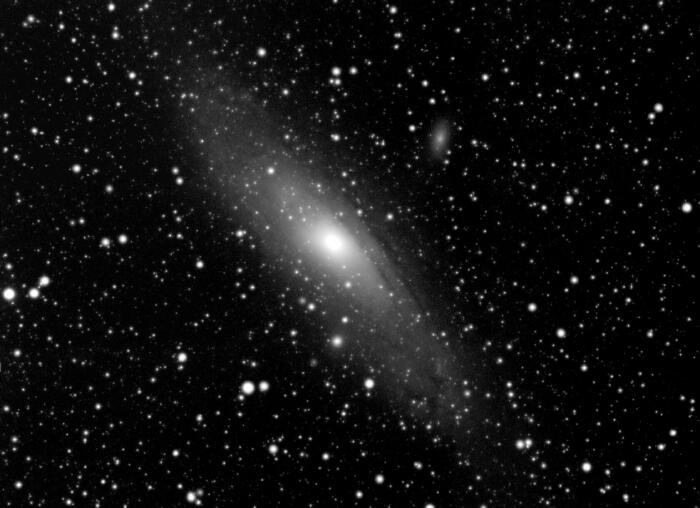 M31
3x3 Mosaic - 70mm Achromat @f5 150sec/per panel (10x15sec.), Assembled
with Panorama Maker
M31
3x3 Mosaic - 70mm Achromat @f5 150sec/per panel (10x15sec.), Assembled
with Panorama Maker
Click here for full resolution image.
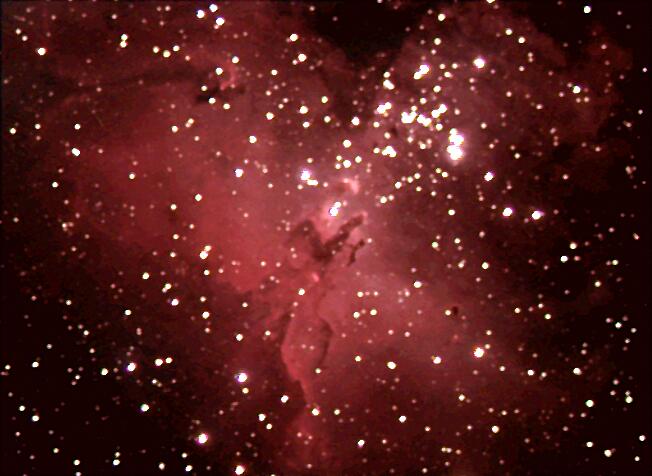 M16 - 8"
Lx200gps @f3.3 10 minutes (20x30sec.) 6/23/2004
M16 - 8"
Lx200gps @f3.3 10 minutes (20x30sec.) 6/23/2004
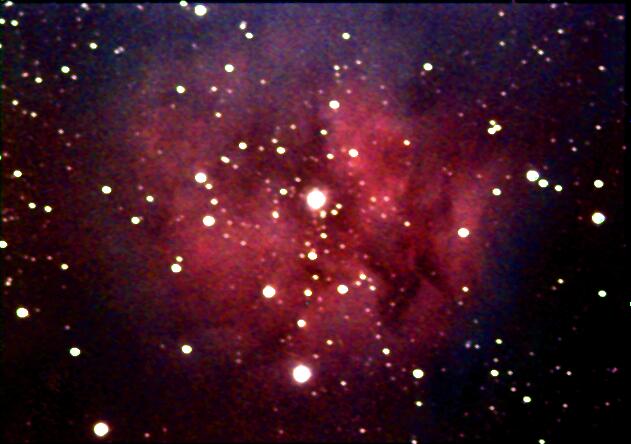 IC5146
Cocoon Nebula - 12" Lx200gps @f3.3, 24 minutes (48x30 sec.) 9/1/2004
IC5146
Cocoon Nebula - 12" Lx200gps @f3.3, 24 minutes (48x30 sec.) 9/1/2004
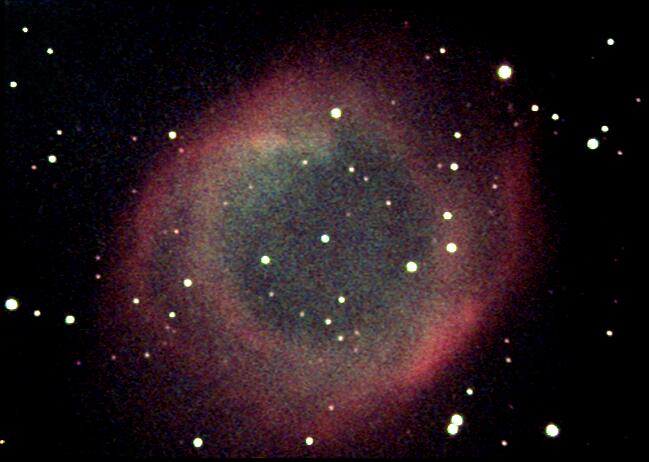 Helix
Nebula - Caldwell 63 (NGC 7293) - 12" Lx200gps@f3.3 12 minutes
(24x30sec.) 10/13/2004
Helix
Nebula - Caldwell 63 (NGC 7293) - 12" Lx200gps@f3.3 12 minutes
(24x30sec.) 10/13/2004
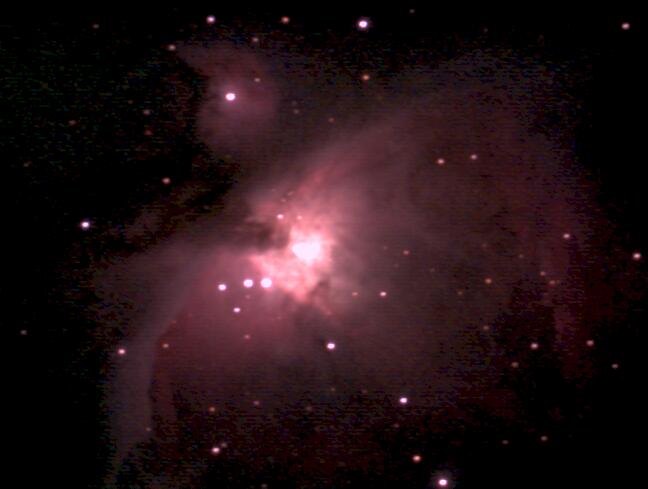 Orion
Nebula - Messier 42 - 4" SCT @f5 12 Minutes (48x15sec.) 10/28/2004
Orion
Nebula - Messier 42 - 4" SCT @f5 12 Minutes (48x15sec.) 10/28/2004
Details:
This image used shorter exposures to prevent the Trapezium from buring
completely out. Also, the chip antiblooming can be overwhelmed by an
object this bright. Finally, since the image is undersampled
(~4.5"/pixel), adding many images that are spatially dithered, prevents
the on chip color matrix from producing artifacts.
DSI Imaging Tips
The DSI imager capture
can be approached at two levels:
1) Beginner level
which automates all processing
- Dark Subtraction
- Alignment
- Image Selection
- Combining
- Resampling to Square Pixels
- Color Demosaicing
This is a
powerful tool, but necessarily makes many assumptions.
2) There is
a "Save Option" to "Save all raw images". When used in this mode, all
raw frames (dark subrtacted if this was enabled) are saved to separate
intermediate files for later off-line processing. You still get the
auto processed image, but have all the pieces that made it up. This is
for the advanced users who wish to flat field, use third party image
processing (or AutostarIP), chase hot pixels, apply frequency domain
filters etc...
The
Keys To Success:
A)
Regardless of which method you use, serious imagers should be sure they
are saving in one of the FITS formats. Anything else is going to save
the "display presentation only!!!!!" and severly
limits what enhancements can be done.
B)
There are two color demosaicing methods supported in the software:
Color Sharp and Color Soft. The color soft method gives better color
saturation at the expense of spatial resolution. I personally prefer
the Color Sharp method and set it. I can use other programs to adjust
the saturation later.
C) There are two readout modes for the camera, a
high speed mode for planets and terrestrial uses, and a slow "low
noise" method for deep sky imaging. When the exposure time is 0.5
seconds or less, you get the fast readout method. If the exposure time
is greater than 0.5 seconds, you get the lowest noise readout method.
Be careful to get the exposure you desire. When "Live" is checked and
"Preview" is not checked, you get exposure time next to "Live". When
you check "Preview" you get the exposure time indicated next to
"Preview" whether "Live" is checked or not.
D)
The brightness and contrast controls in the capture program are very
rudimentary. Autostar IP has more flexible stretching, color adjustment
and filtering. For quick images, like that M42, I let the automated
robot do most of the work. Save as FITS3P and then load it into
Autostar IP and stretch and color balance there. Total processing time
is only a minute or two per image.
When I want
the very utmost, I save all the intermediate files and use
AutostarIP/MaximLD and Photoshop to squeeze out the last bit.
Be careful. You must:
0- If you had dark
subtract enabled, you should first add the dark used back into all
native frames. You can then apply a different dark. Best darks are made
by bracketing the exposure. Take 6 more more dark frames in "deep sky"
mode with out autoalignment saving all raw frames. Repeat after the
imaging frames. These two sets averaged together will approximate best
the temperature range over which the images were made. After backing
out the auto-darks, you can apply your high precision darks.
1- Dark subtract in native format
2- Flat field in native format
3- demosaicing the frames into R,G,B,L frames
4- Process all frames identically
5- Select, Align
6- Filter, Stretch, Patch noodle whatever
7- Combine R's, G's, B's, L's
8- Color Merge
9- Balance/Adjust
10- Resample to square pixels (flux conserving or anti-aliasing)
11- Print it!
E)
The IR blocking filter is removable by design. This allows greater
sensitivity when using the imager as a mono imager or guider. It is
said that you can also do deep sky color without it, but color balance
can be funny, mostly on reflection nebula. Handle it carefully, if you
screw up the coatings, you will have to order a replacement from
Edmunds optics.
|